User Interface
The Dashboard SDK provides a handful of UI commands which allow to provide standardized features to each Enplug app.
Header#
The header section allows the user to see the current app, the name of the view or take actions. The header is a part of the Dashboard and the app can modify it through SDK commands.

An example of how the header can look like.
From the left:
- the icon of the app and the app's name - both are set by the Dashboard based on the app's parameters set when creating the app
- page's title
- action buttons on the right
Let's have a look how these can be changed.
Title#
To change the title, for example when you navigate to the Asset setup view:
enplug.dashboard.setHeaderTitle('Setup');See more: enplug.dashboard.setHeaderTitle()
Buttons#
The app can add buttons to the header to provide user with some easily accessible actions.
In most cases, you want to implement two scenarios:
- when Asset list view is presented, a button for creating new asset is presented
- for the Asset setup view, two buttons can be presented - for going back to the Asset list and saving the currently edited asset
Asset list#
When your app presents the Asset list, you can present a single button in the header allowing to create a new asset. Clicking on it should navigate to the Asset setup view.

A single primary action button
enplug.dashboard.setHeaderButtons([ { text: 'Add Calendar', action: () => { /* your code to navigate to the Asset setup view to create a new asset */ }, class: 'btn-primary' }]);See more: enplug.dashboard.setHeaderButtons()
Asset setup#
In case of the Asset setup, you can show two buttons:
- navigating back to the Asset list
- saving the asset
It is also best to detect whether there were some changes introduced by the user and enable the 'Save' button accordingly. For that purpose, you can create a function which should be invoked every time this situation changes.
Two buttons: one secondary, one primary which is optionally disabled
function updateButtons(hasUnsavedChanges: boolean) { enplug.dashboard.setHeaderButtons([{ text: 'Cancel', action: () => { /* your code to navigate back to the Asset list */ }, class: 'btn-default' }, { text: 'Save', action: () => { /* your code saving the asset */ }, class: 'btn-primary', disabled: !hasUnsavedChanges // this will disable the button if there are no unsaved changes }]);}See more: enplug.dashboard.setHeaderButtons()
Display Group selector#
A very important part of the Asset list view is to allow users to filter the assets, so they only see assets assigned to certain Display Group. Also, the dashboard itself can navigate to your app with this Display Group preselected, when the user clicks on your app in the Display Group editing view.
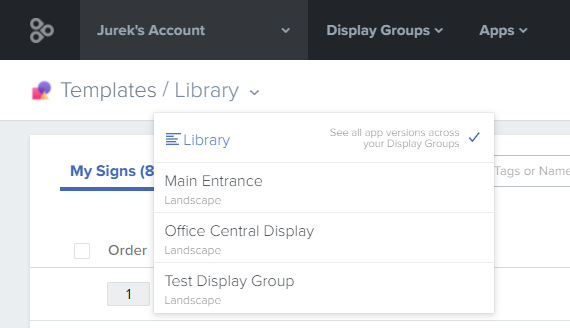
Display Group selector dropdown
For proper support of these features, you should update your header in the Asset list view to support the Display Group selector.
enplug.dashboard.setDisplaySelectorCallback(async () => { // update your asset list using enplug.account.getAssets() which will return // the assets assigned to the selected Display Group only yourAssetList = await enplug.account.getAssets();});See more: enplug.dashboard.setDisplaySelectorCallback()
Also, any other views, such as the Asset setup view, should hide the selector option.
enplug.dashboard.setDisplaySelectorVisibility(false);See more: enplug.dashboard.setDisplaySelectorVisibility()
Progress indicators#
If you want to indicate a pending process to the user, you can use the Loading, Success or Error indicator commands.
tip
When saving the asset using enplug.account.saveAsset(), the dashboard will automatically present such progress indicator.
Loading#
To indicate an ongoing process, such as fetching something from an external server or asset removal in progress, Loading indicator can be used.
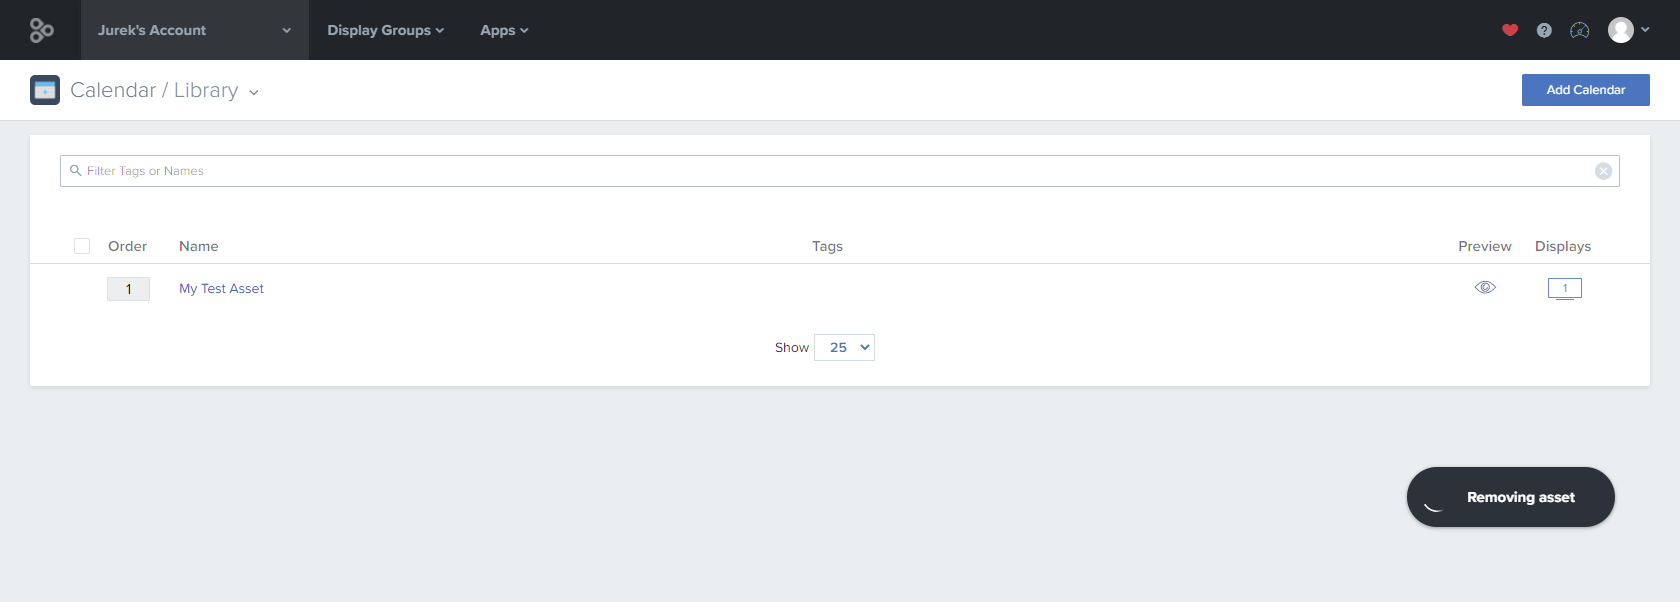
enplug.dashboard.loadingIndicator('Removing asset');See more: enplug.dashboard.loadingIndicator()
caution
The loading indicator will spin endlessly until it ends with either Success or Error indication. You should always call the Success or Error indicator at some point after using the Loading one.
Success#
If you want to inform about a successful outcome, you can present the Success indicator.
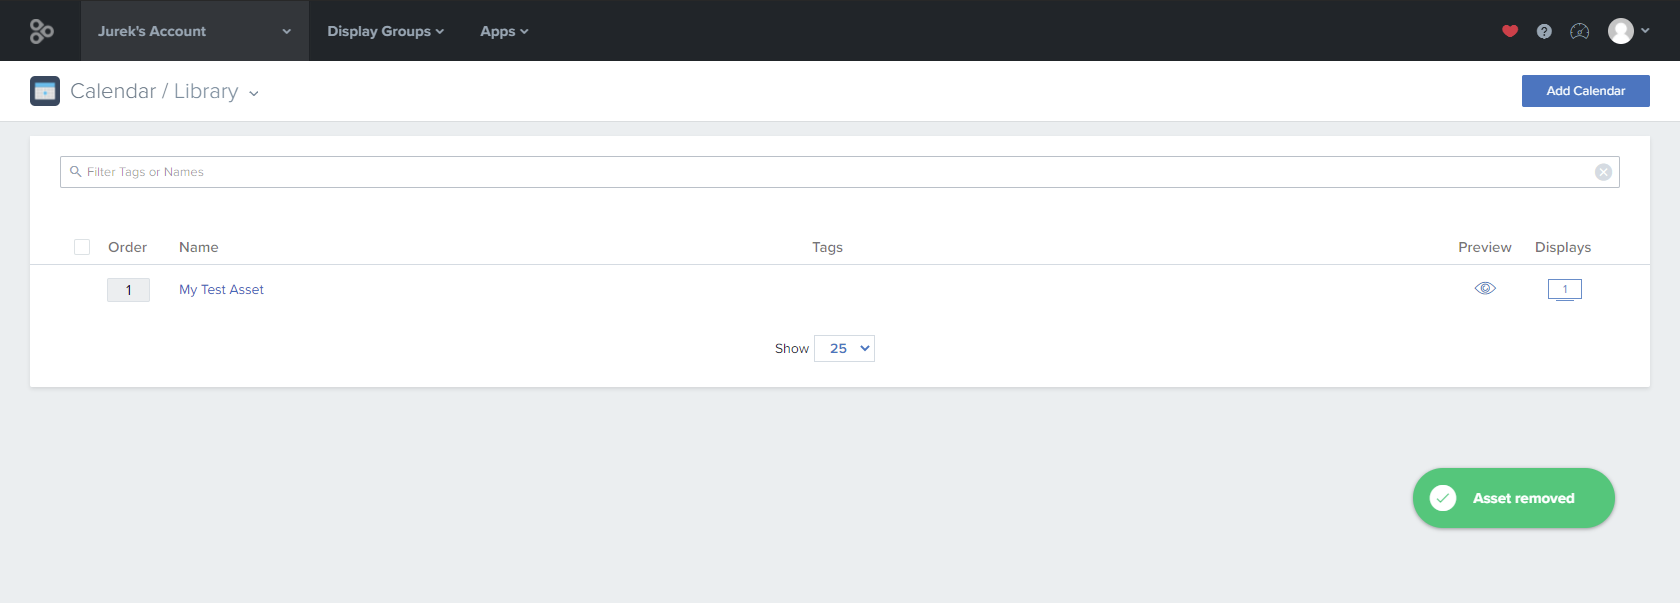
enplug.dashboard.successIndicator('Asset removed');See more: enplug.dashboard.successIndicator()
Error#
If the action fails, you can present the Error indicator.
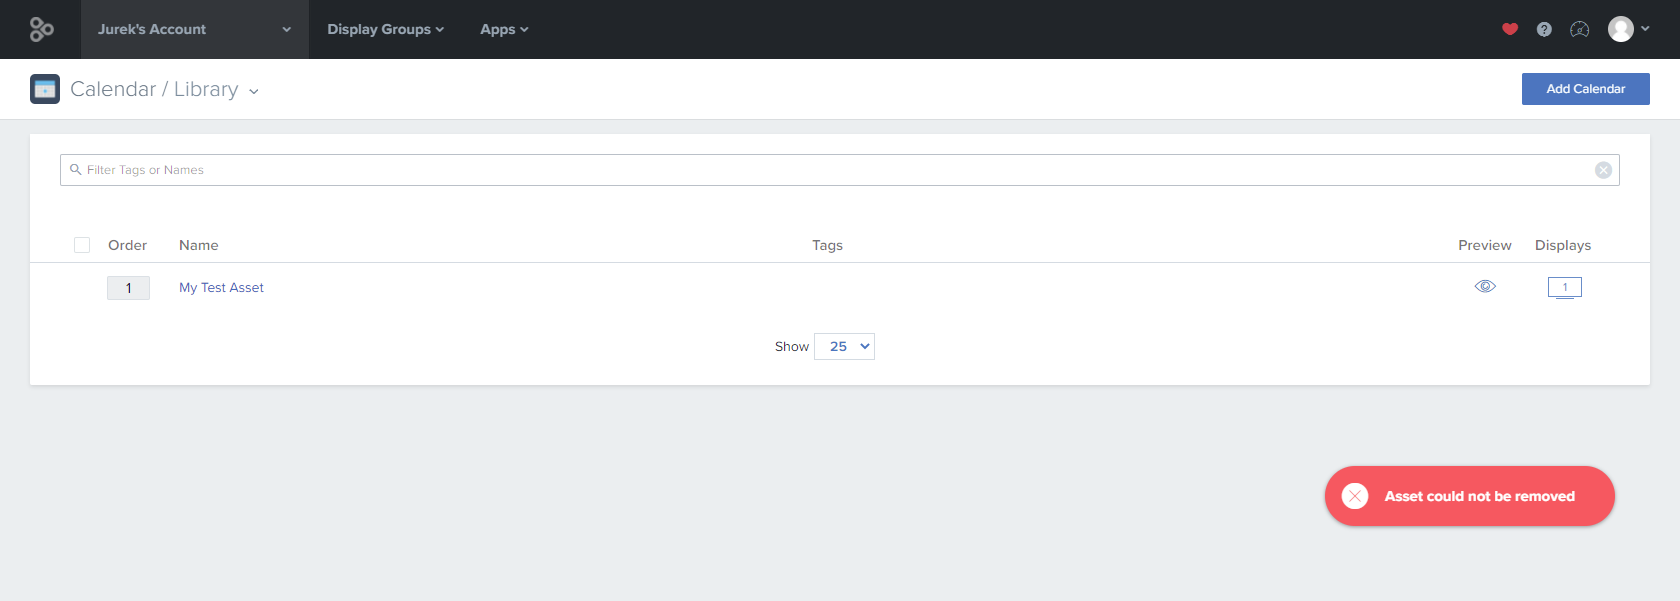
enplug.dashboard.errorIndicator('Asset could not be removed');See more: enplug.dashboard.errorIndicator()
Dialogs#
The Dashboard SDK provides convenient ways to show various dialog windows such as the asset preview modal or a prompt when user performs critical actions such as confirming asset removal.
Preview asset modal#

Preview asset modal
To allow the user to see how the asset will look like without deploying it to a Display Group, it is best to provide a preview option in the Dashboard part of your app.
function showPreview(asset: Asset<AssetModel>) { enplug.dashboard.previewAsset({ asset });}See more: enplug.dashboard.previewAsset()
The above code will open a preview window with the provided asset and will use an iframe to run the Player URL provided in the app's definition. The provided asset's value will be passed to the app.
For the available preview customization options, see AssetPreviewRequest.
Confirm#
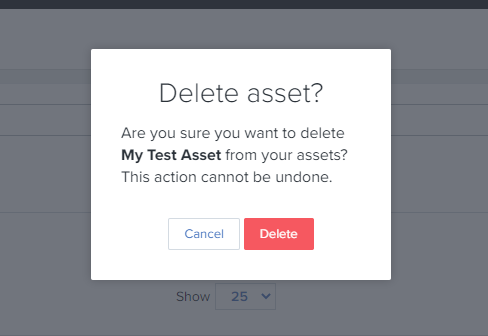
Confirm dialog
When the user is about to remove an asset, you can prompt them with a confirmation dialog.
try {  await enplug.dashboard.openConfirm({    title: 'Delete asset?',    text: 'Are you sure you want to delete this asset? This action cannot be undone.',    cancelText: 'Cancel',    confirmText: 'Delete',    confirmClass: 'btn-danger'  });
// remove the asset} catch { // user cancelled}See more: enplug.dashboard.openConfirm()
Unsaved changes#
When your app has unsaved changes, for example when the user is editing an asset and the changes were not saved yet, you can do a few things to increase the safety and user-friendliness in this situation:
- Present the 'Unsaved Changes' dialog whenever the user tries to navigate away within your app.
- Add 'beforeunload' listener to prevent accidental page reload/navigation.
- Inform the Dashboard about the app having unsaved changes.
Presenting the Unsaved Changes dialog#
If you would like to make the user confirm his action, when you have unsaved changes in the current view and continuing would lead to their loss, you can present a special 'unsaved changes' confirmation dialog.
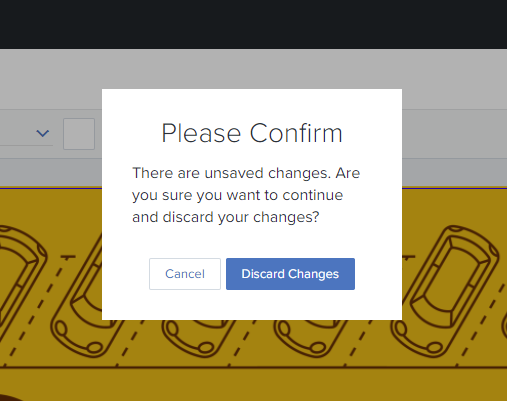
Unsaved Changes dialog
try { await enplug.dashboard.confirmUnsavedChanges(); // user confirmed - take action} catch { // user cancelled}See more: enplug.dashboard.confirmUnsavedChanges()
Using 'beforeunload' event#
The user can accidentally try to reload or navigate to a new URL using Web browser's controls.
This can be prevented by using the beforeunload event. This will display browser's generic prompt in the mentioned cases.

Browser's built-in unsaved changes dialog
window.addEventListener('beforeunload', (event) => { if (hasUnsavedChanges()) { // adjust this to access your code detecting unsaved changes event.returnValue = true; event.preventDefault(); }});See more: beforeunload
Informing the Dashboard about unsaved changes#
The third way the user can navigate away from your app is by using navigation options in the Dashboard's navigation bar, such as navigating to other app using the Apps dropdown. To handle these cases we need to keep informing the Dashboard about the state of unsaved changes each time this state changes.
enplug.dashboard.setAppHasUnsavedChanges(hasUnsavedChanges);See more: enplug.dashboard.setAppHasUnsavedChanges
Each time the unsaved change state changes in your app, you should call the enplug.dashboard.setAppHasUnsavedChanges function with the proper state. This will inform the Dashboard whether it should enable or disable its navigation guards.
When enabled, when the user tries to navigate away using the Dashboard's navigation bar, the 'Unsaved Changes' dialog will be presented.
caution
All the above methods are not connected together and work separately and independently. This means that, for example, if you confirm the 'Unsaved Changes' dialog presented by your app, it will not turn off the Dashboard's guards, so you will need to do it manually by calling enplug.dashboard.setAppHasUnsavedChanges(false).