Implementing your App
Getting Started#
An app running in the Enplug system consists of two parts, so you will need to develop two separate JavaScript-driven Web apps:
Dashboard part
- runs in an iframe in the Dashboard
- used to add new assets and configure their appearance and content
- used for managing the assets and assigning them to Display Groups
- communicates with the Dashboard through the Dashboard SDK
Player part
- runs in an iframe in the Player
- used to present the content on the displays
- communicates with the Player through the Player SDK
Summarizing, both parts are regular Web apps (HTML+CSS+JS) running in iframes and communicating with the hosting Dashboard or Player using the Enplug's JavaScript SDKs. There are no requirements regarding frameworks and tools used. The app is run in an iframe, so it is separate from the rest of the system and communicates with it using the SDK only.
note
If you want to jump right into the code, please take a look at our Angular app-seed project to view how our Dashboard and Player SDK can be implemented to create an app of your own! Even if you do not use Angular, it might give you a good hint how the SDKs work and how the app can be structured.
Adding an App#
In this article you will learn how to use the Enplug SDK to develop your apps. It is worth to create a new app in the Enplug system, so it appears in the Dashboard and you can develop it more easily and test the results in a real environment. More on that in the Creating an App article.
Dashboard part#
First, the user needs to be able to configure the assets and add them to some Display Groups of theirs which is what the Dashboard part of the app is for. For that purpose you need to create a Web app which will be run within the Dashboard's iframe.

Connecting the Dashboard SDK#
In order to be able to use the Dashboard SDK in your code, load the SDK in the <head> section of your HTML file.
<script type="text/javascript" src="https://apps.enplug.com/sdk/v1/dashboard.js"></script>This will create a global enplug object through which you will be able to access all SDK commands, which will communicate with the Dashboard.
If you use TypeScript and would like to have the typings checked in your IDE you can load the following NPM package:
npm install @enplug/sdk-dashboard --save-devThen, add "@enplug/sdk-dashboard" to the types array in your TypeScript config file. Make sure that typeRoots array has the "node_modules" entry, so that the whole path is available to the compiler.
Loading the app#
When an app gets selected from the 'Apps' dropdown in the navigation bar, its Dashboard URL gets loaded in an iframe filling the main space below the navigation bar. The Dashboard will present a loading spinner. Once your app is ready to be displayed on screen, you should call:
enplug.dashboard.pageLoading(false);See more: enplug.dashboard.pageLoading()
This will hide the spinner and present the iframe with your app to the user.
Implementing views#
Usually, the Dashboard part of the app consists of two views:
- Asset setup - used to configure and customize the asset
- Asset list - presenting all assets made with the app and options to open them for editing, remove, preview, etc.
Your app should start in the Asset list view, however if no assets are available, it is best to navigate the user directly to the Asset setup view to create the first asset.
Asset setup#
If you want to create a new asset or open some asset for editing, your app should present the Asset setup view.
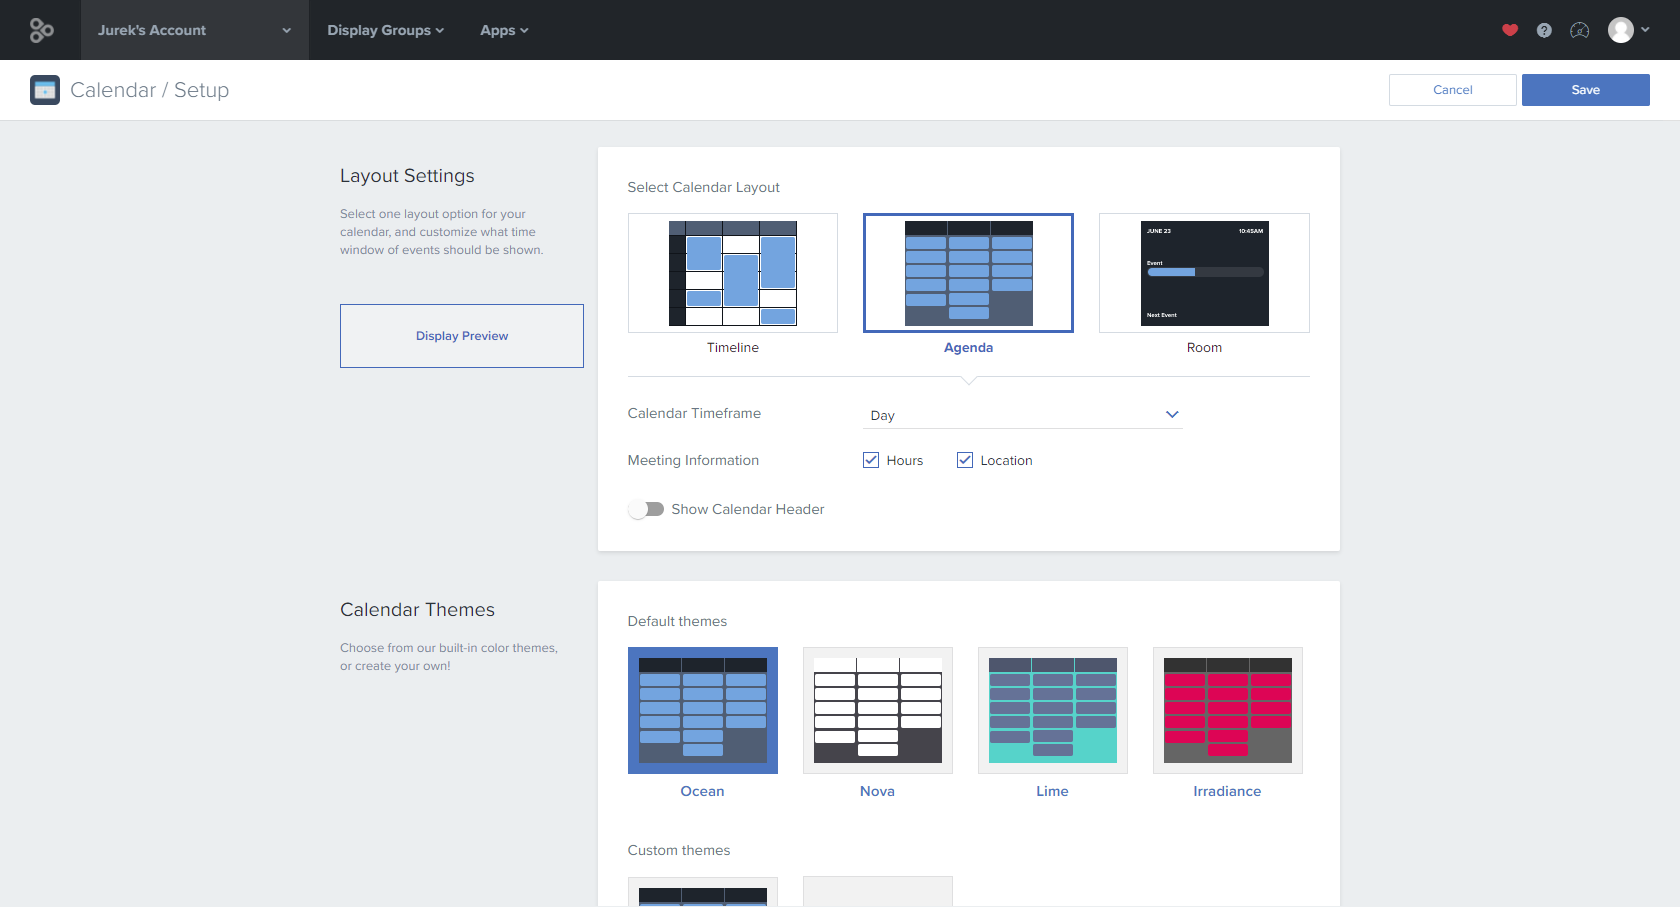
An example of the Asset setup view
Initializing the asset#
If you want to create a new asset, initialize the Asset object.
const asset: Asset<YourModel> = { Id: undefined, // undefined means that it is a new asset Value: { // this is where you put all customizations, it is of type YourModel (as provided above) someCustomSetting: 'Initial value', otherSetting: true }, VenueIds: [] // list of Display Groups to which this asset is assigned, empty by default};If you want to open some asset for editing, you should have this asset's ID. You can use the SDK to fetch this asset.
const asset = await enplug.account.getAssetsById([assetId]);See more: enplug.account.getAssetsById()
Customizing the asset#
Once you have your asset prepared, the user should be able to customize the appearance and/or content of the asset with various input fields, drop-downs or whatever else is needed in your case.
All customizations should be stored within the asset.Value object. Once the user has fine-tuned the settings, the asset can be saved.
const dialogOptions: DeployDialogOptions = {  showSchedule: true,  scheduleOptions: {    showDuration: true  }};
const savedAsset = await enplug.account.saveAsset(asset, dialogOptions);See more: enplug.account.saveAsset()
There are many scheduling options available which you can enable for your assets. See DeployDialogOptions and scheduleOptions for more.
With the above settings, if a new asset is saved, the deploy dialog will be shown. Otherwise, the asset will get saved instantly.
After saving a new asset, the user can navigate to the Asset list.
Asset list#
This view should present a list of all assets and allow the user to open them for editing and removal.
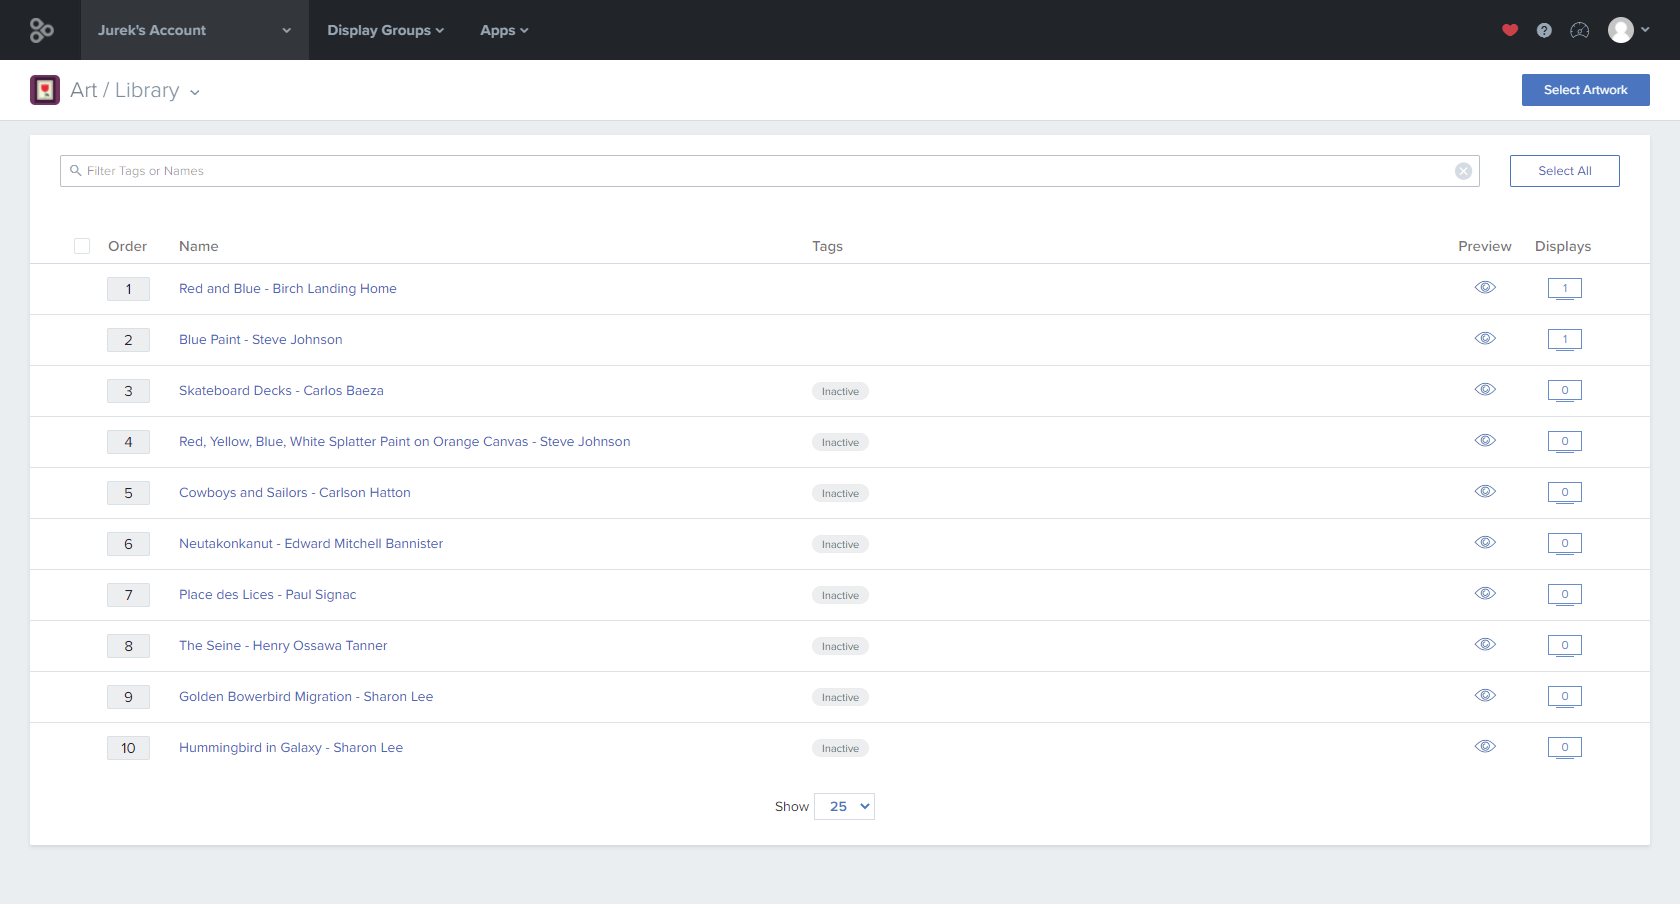
An example of the Asset list view
Useful APIs for this view:
Fetching asset list#
const assets = await enplug.account.getAssets();See more: enplug.account.getAssets()
You can present the returned array of Assets to the user.
Removing the asset#
await enplug.account.deleteAsset(assetId);See more: enplug.account.deleteAsset()
note
You should update the asset list after successful removal.
Deploy options#
Your app should allow users to modify the scheduling options and the list of Display Groups to which the asset is deployed. To do this, you can also use the enplug.account.saveAsset() method, however with different options specified than previously.
const dialogOptions: DeployDialogOptions = {  showDeployDialog: true, // this will show the deploy dialog for an already existing asset  showSchedule: true,  scheduleOptions: {    showDuration: true  }};
const updatedAsset = await enplug.account.saveAsset(editedAsset, dialogOptions);Player part#
The second part of the app is also a Web application which also runs in an iframe, however this one runs in the Player on the Enplug Device, Enplug Screensaver or in the Web browser using a special Content URL.

If there is an asset created and deployed to a Display Group, each Player in that Display Group will put this asset into rotation. Then, when the Player decides that it is the time to show this asset, an iframe with this app's Player URL will be created and your app will need to prepare and display the content. For more details on how the Player initializes and disposes the app, see App Lifecycle.
Connecting the Player SDK#
As with the Dashboard SDK, use the <head> section of your HTML file.
<script type="text/javascript" src="https://apps.enplug.com/sdk/v1/player.js"></script>This will create a global enplug object providing various SDK methods for communicating with the hosting Player.
If you use TypeScript and would like to have the typings checked in your IDE you can load the following NPM package:
npm install @enplug/sdk-player --save-devThen, add "@enplug/sdk-player" to the types array in your TypeScript config file. Make sure that typeRoots array has the "node_modules" entry, so that the whole path is available to the compiler.
Presenting the content#
First, the app should fetch the asset's value.
const assetValue = await enplug.assets.getNext();See more: enplug.assets.getNext()
The assetValue will have the same exact value as the asset.Value saved in the Dashboard part, so you will have the access to all customizations made by the user.
To make sure that there is no flickering when the app is presented on the screen, your app should prepare and preload the content. After this is done, inform the Player that the app is ready to be displayed.
enplug.appStatus.start();See more: enplug.appStatus.start()
This will inform the Player that the app is ready to be shown on screen.
App Lifecycle#
The above should get you started with the Player part. For more details about how the Player and app can communicate and when it exactly shows and hides, see App Lifecycle.
Next steps#
Once you have your app ready, you should release it to a publicly available server and Create an app in the Enplug system, so it is available to the users. If you need more guidance, check the Guides section and have a look at our Angular app-seed project, which might be useful even if you do not use Angular in your app.